|
Whoever thought of wrapping meat around fish and grilling them together was a genius and is a friend of mine, although we've never met. 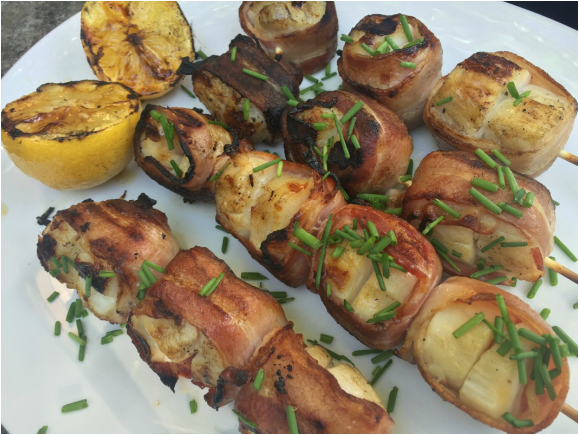 Here's what you need:
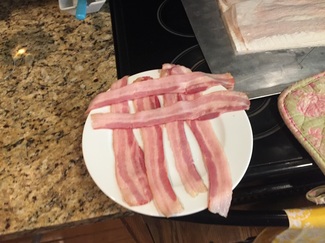 Here's the trick to making this dish. Render the fat from the bacon before grilling. This will help prevent flare-ups and scorching the crap out of your bacon-wrapped shrimp. Rendering? Yes. Rendering. That means getting the fat out. For this recipe, we want to render the fat (get the fat out) of the bacon. And that requires layer of paper towels on large plate or baking dish. Layer the paper towels with layers of strips of bacon. So, put down a layer of paper towel. Then lay down strips of bacon onto that layer of towel. Then, repeat. Towel. Bacon. Repeat. Put this into the oven at 350 until the bacon fat begins to render (come out). The bacon should not be totally cooked. Just wet and soft. Cook about 5 minutes. 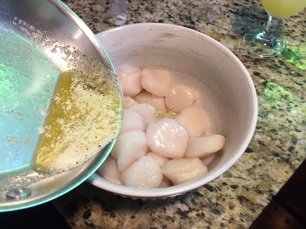 Toss scallops, butter, salt, and pepper together in bowl until scallops are thoroughly coated with butter.
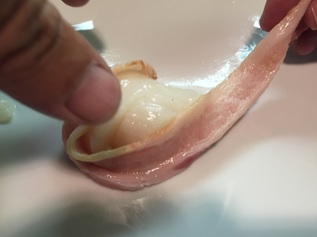
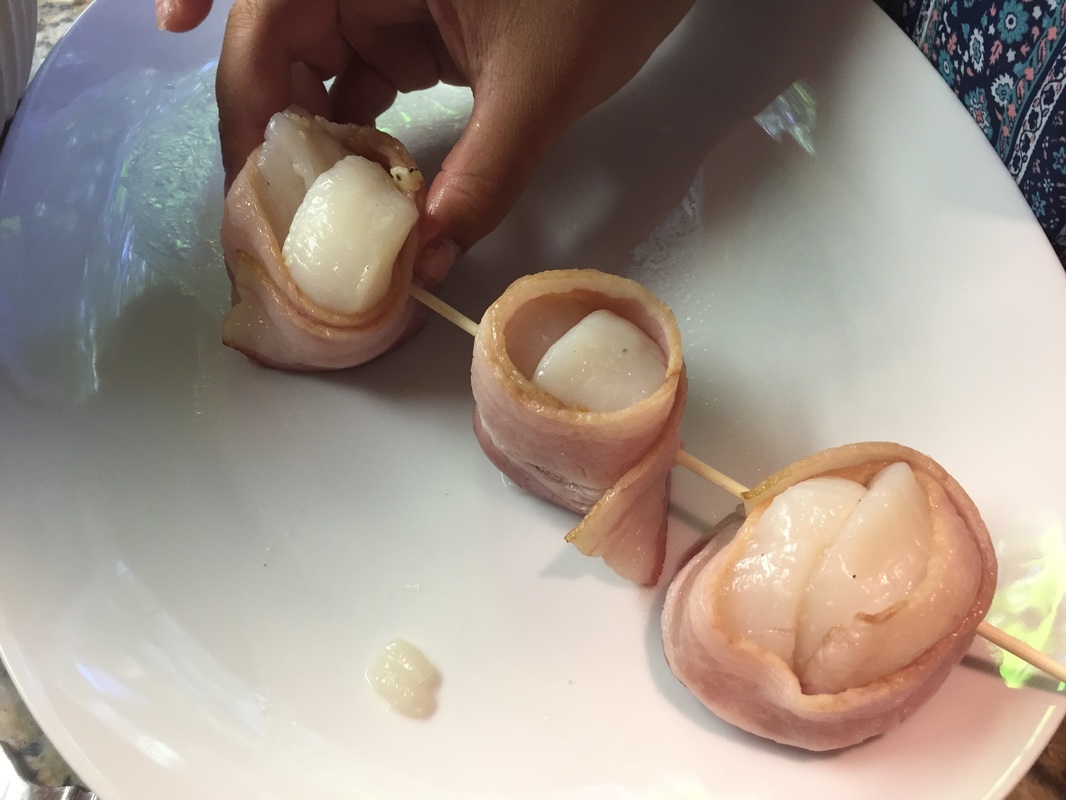
Press 2 scallops together, side to side, and wrap with 1 slice bacon, trimming excess as necessary. Push the wrapped scallops onto the skewers. Repeat. Press. Wrap. Skewer. Repeat. 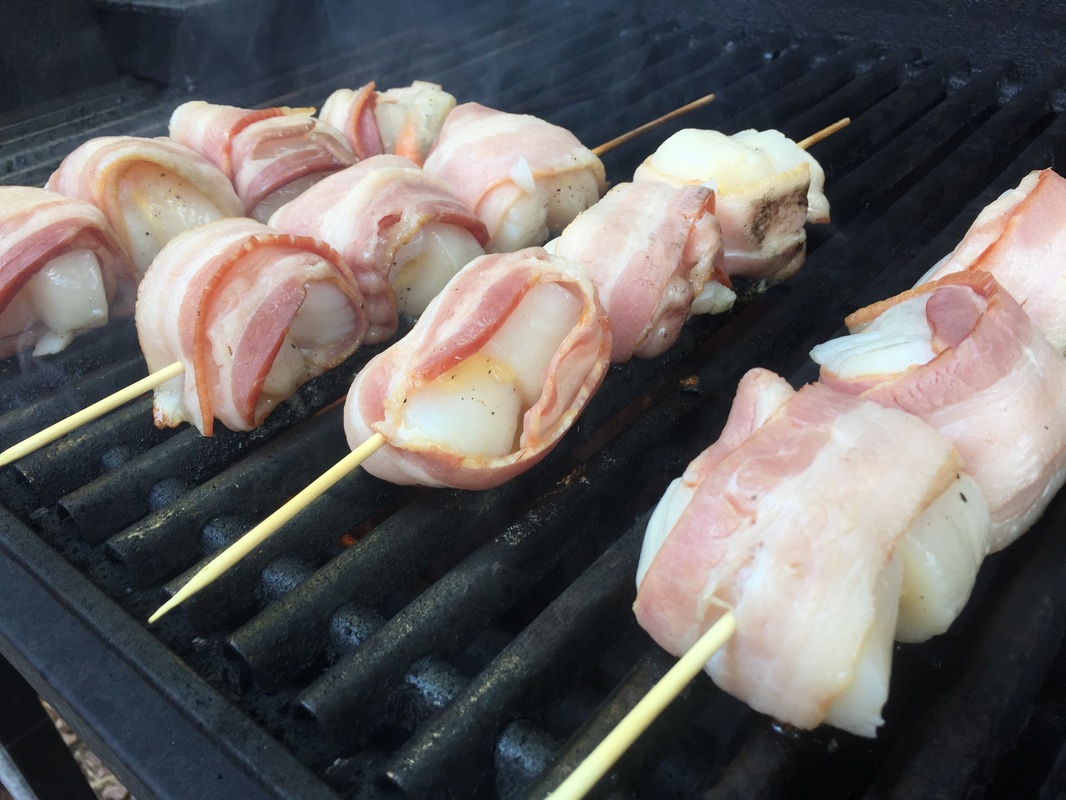 Turn all burners to high. Scrape and clean and oil the grill grate. You could use an oil-soaked paper towel. Place the skewers with the bacon side down. Yes. Bacon side down. 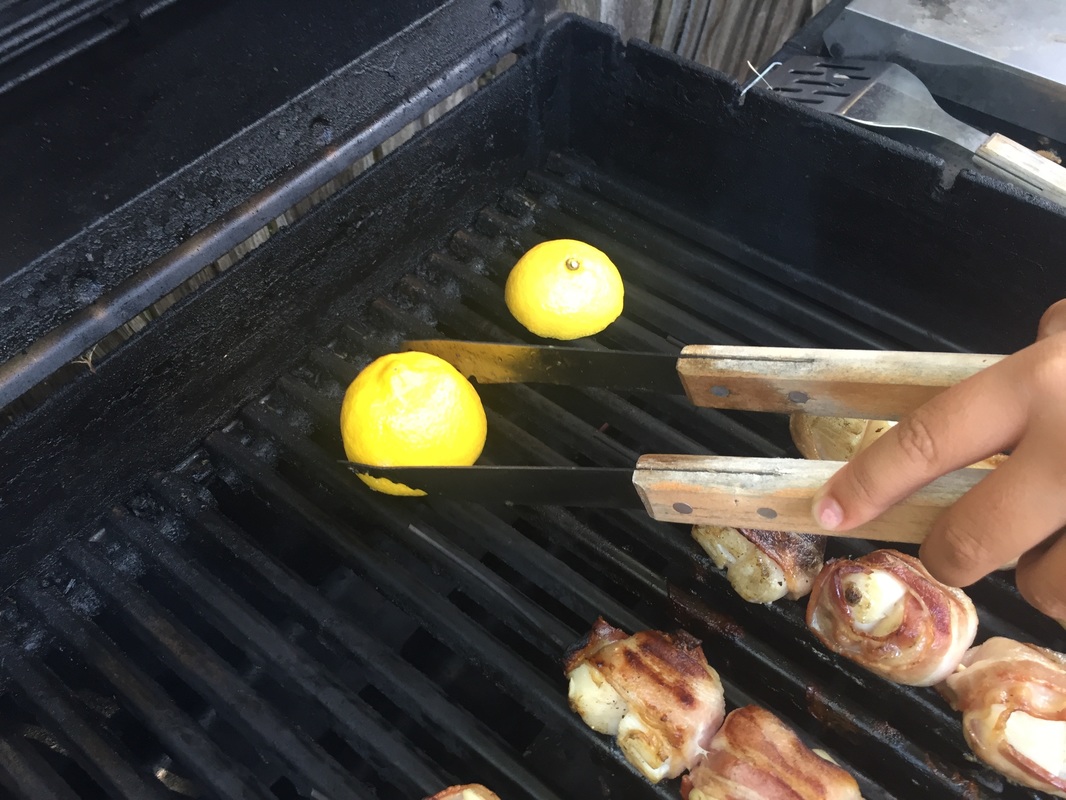 And place the lemon halves on the grill with the cut side down. Cook the skewers until the bacon is crispy on first side. That'll take a few minutes. 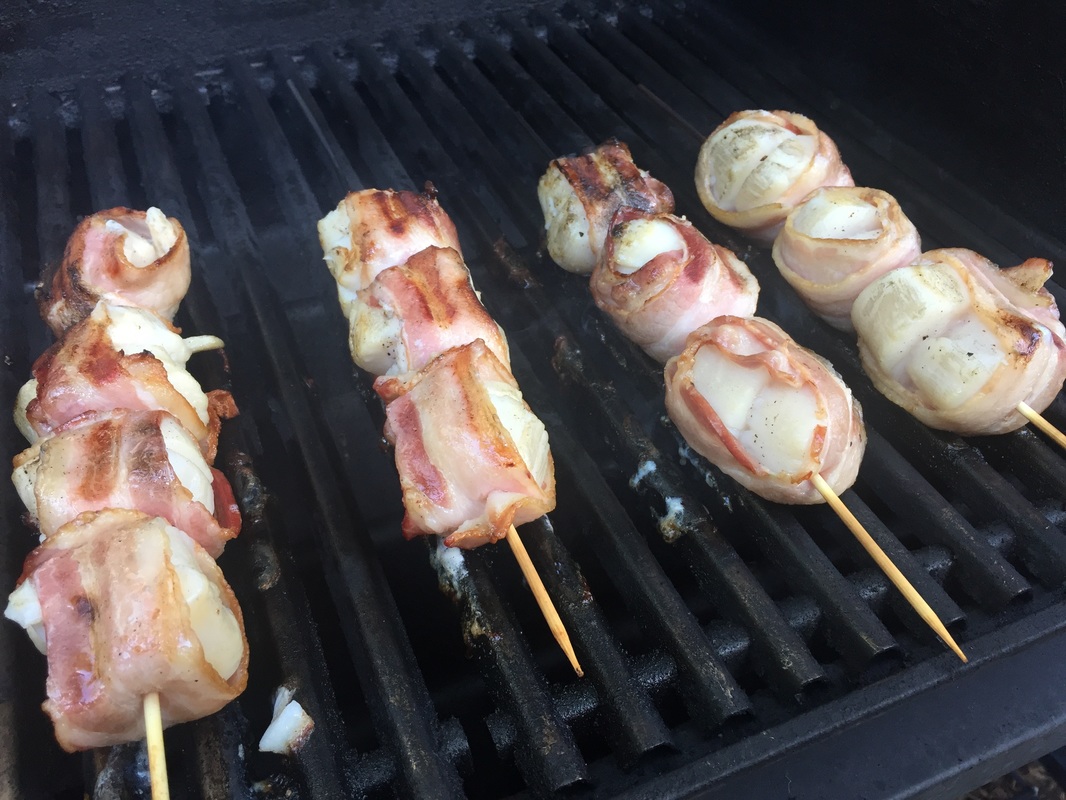 Flip the skewers onto other bacon side and cook until crispy. Another few minutes. 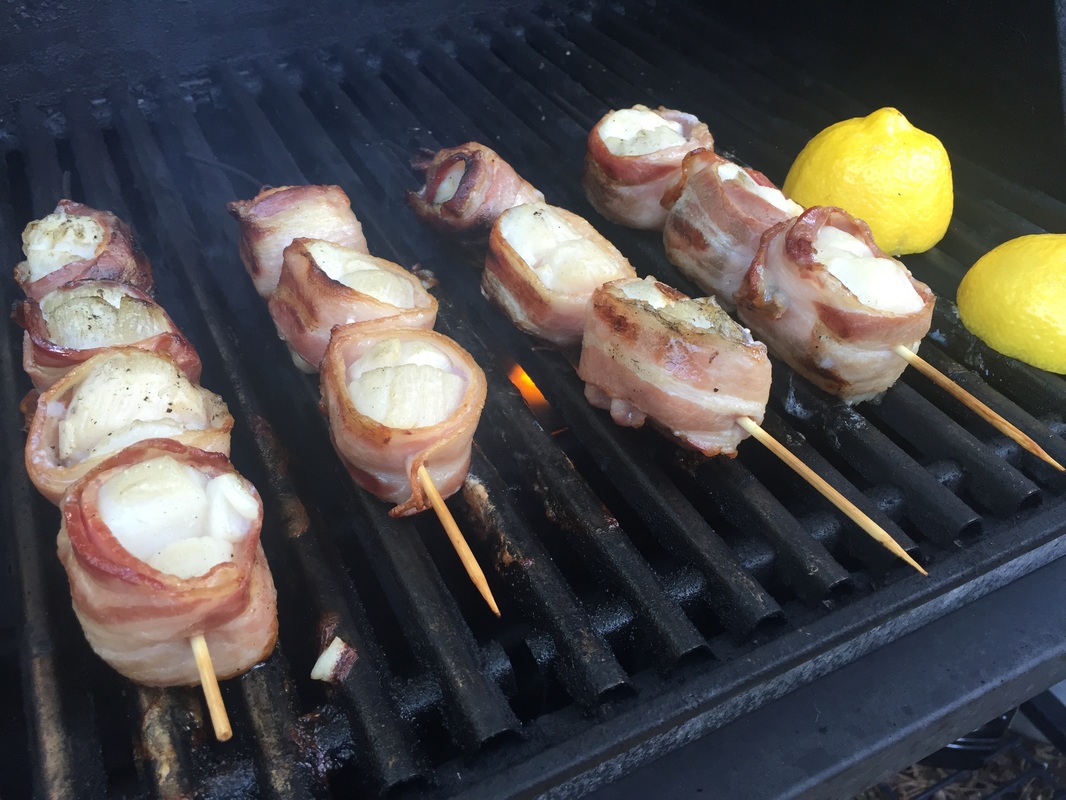 Then, flip the skewers with the scallop side down and grill until the sides of scallops are firm and centers are opaque (white). 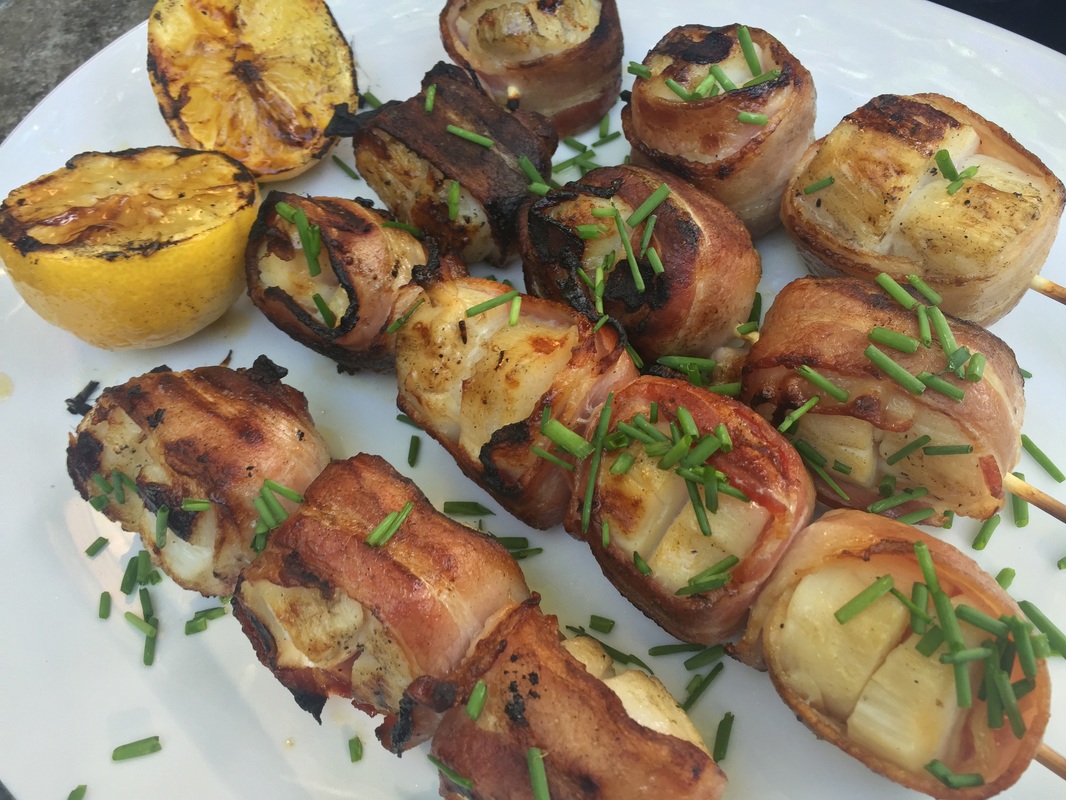 Move the skewers on a serving plate. Squeeze the lemons onto the skewers, and sprinkle chopped chives on top. Beautiful. 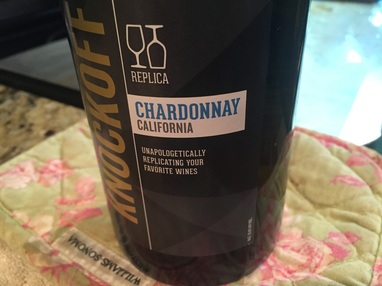 Serve with some wine. We tested many wines to pair with the bacon-wrapped scallops. We like the Chardonnay from California. 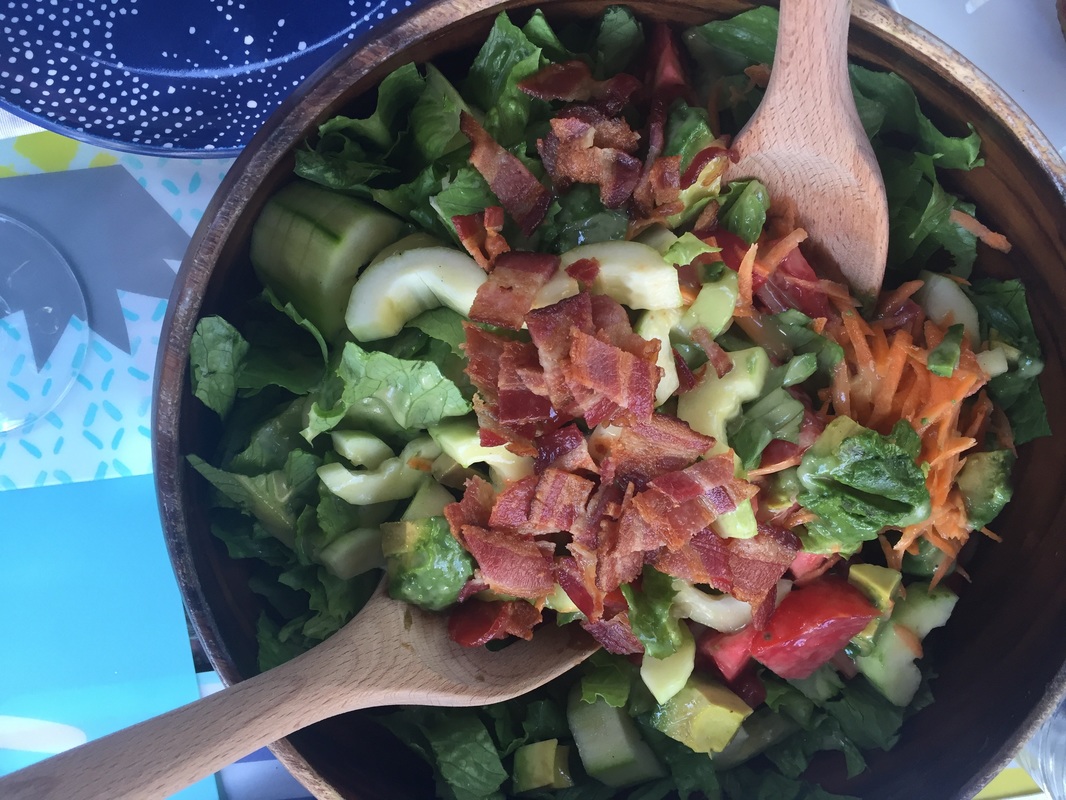 We recommend serving the dish with a salad, with Romaine lettuce, cucumber, carrots, tomatoes, and (of course) bacon.
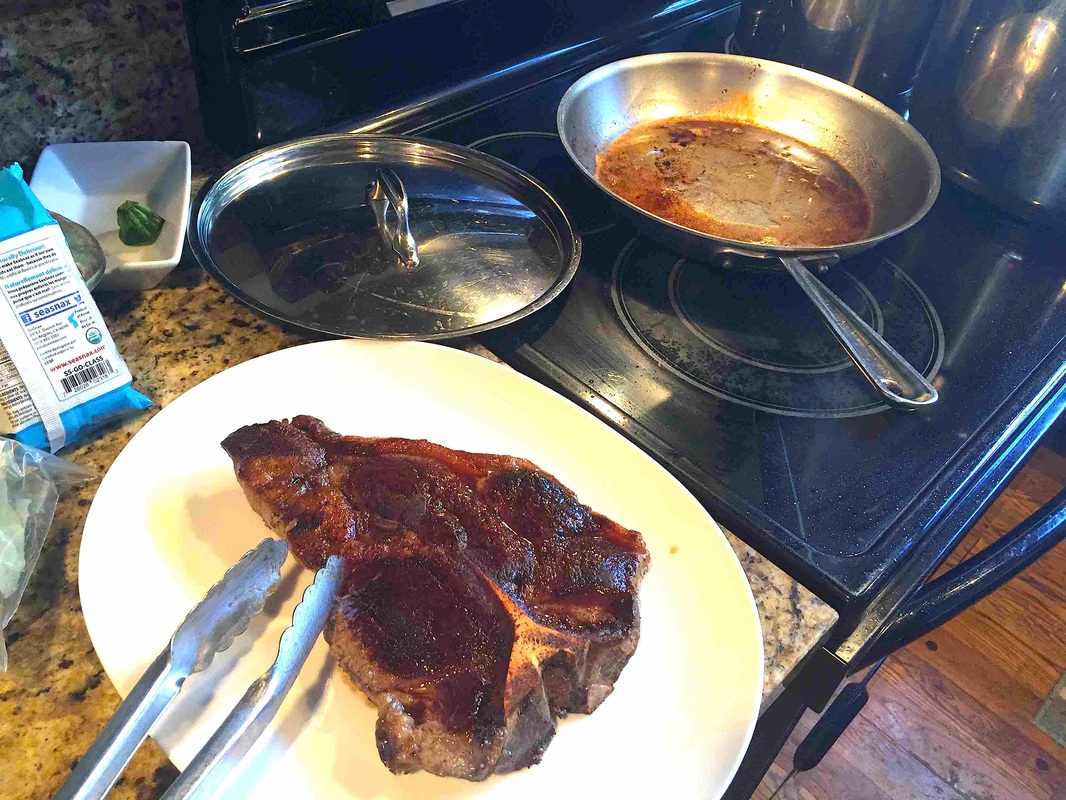
Good job, man. Eat.  Here's a recipe to make a pan-seared steak with a red wine sauce. We first sear the steaks, throw them in the oven to cook slowly, then make the sauce using the same pan. 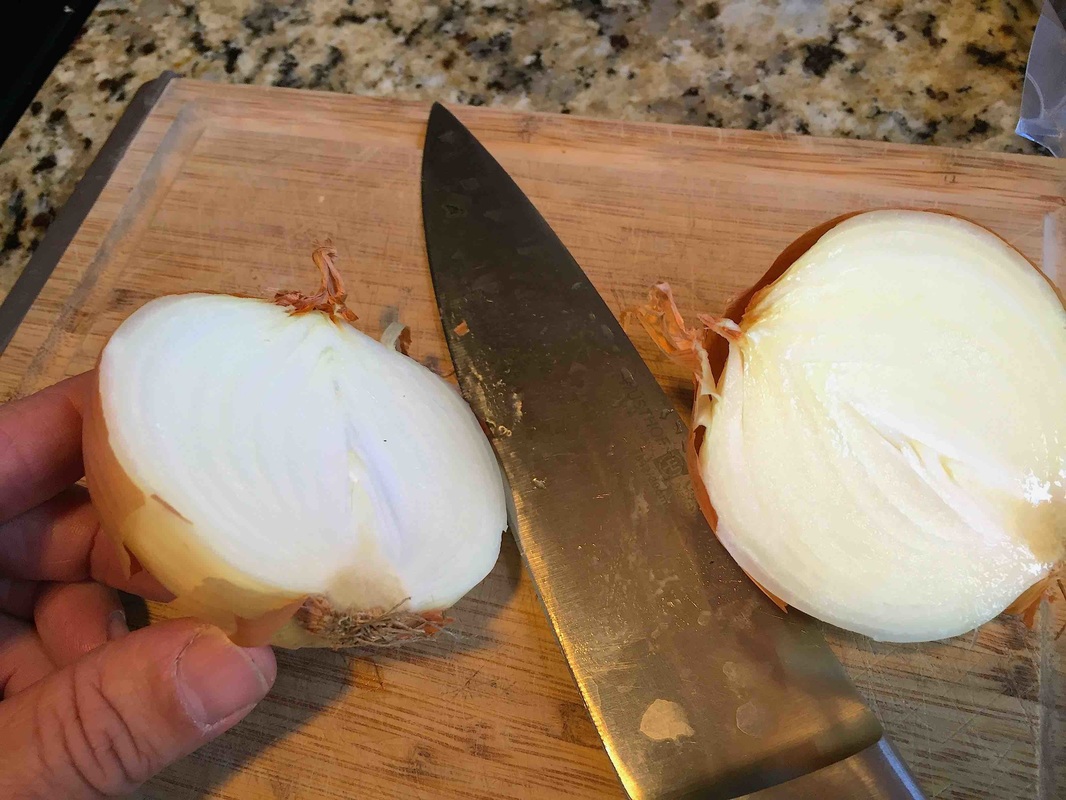 It starts with cutting up an onion, sauteeing it, and adding that to the sauce. 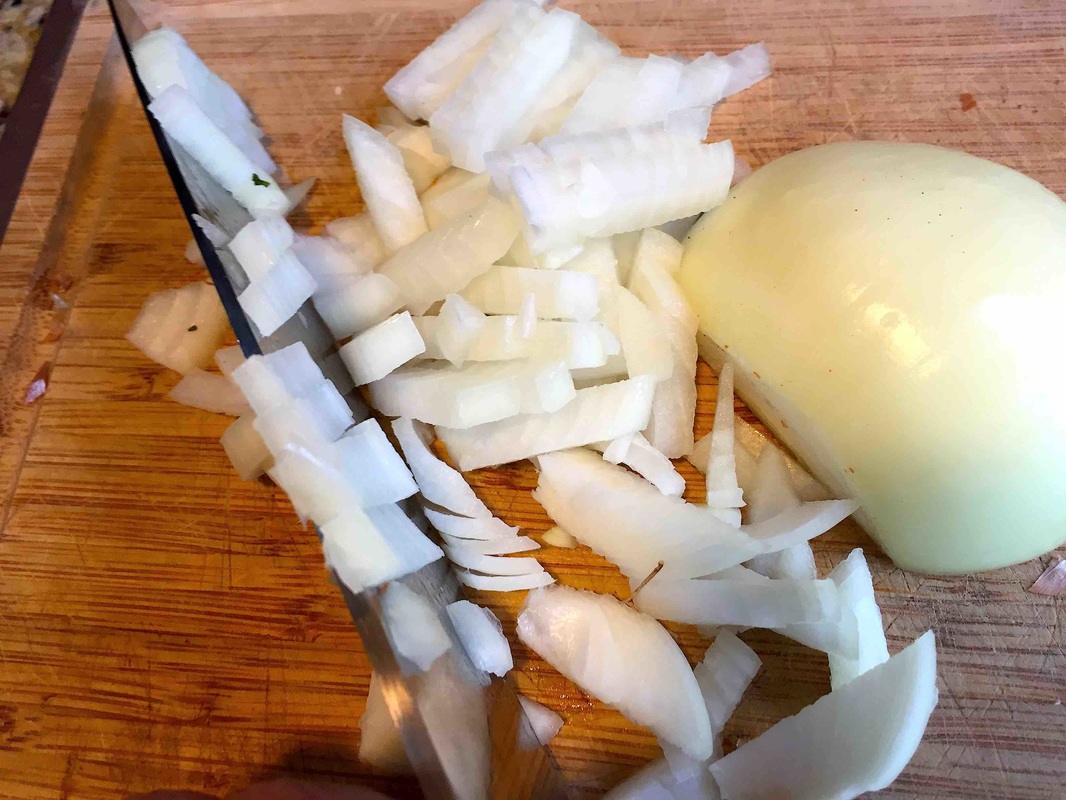 Chop off the ends of the onion, peel off the outer skin layers, then dice it all up into chunks. 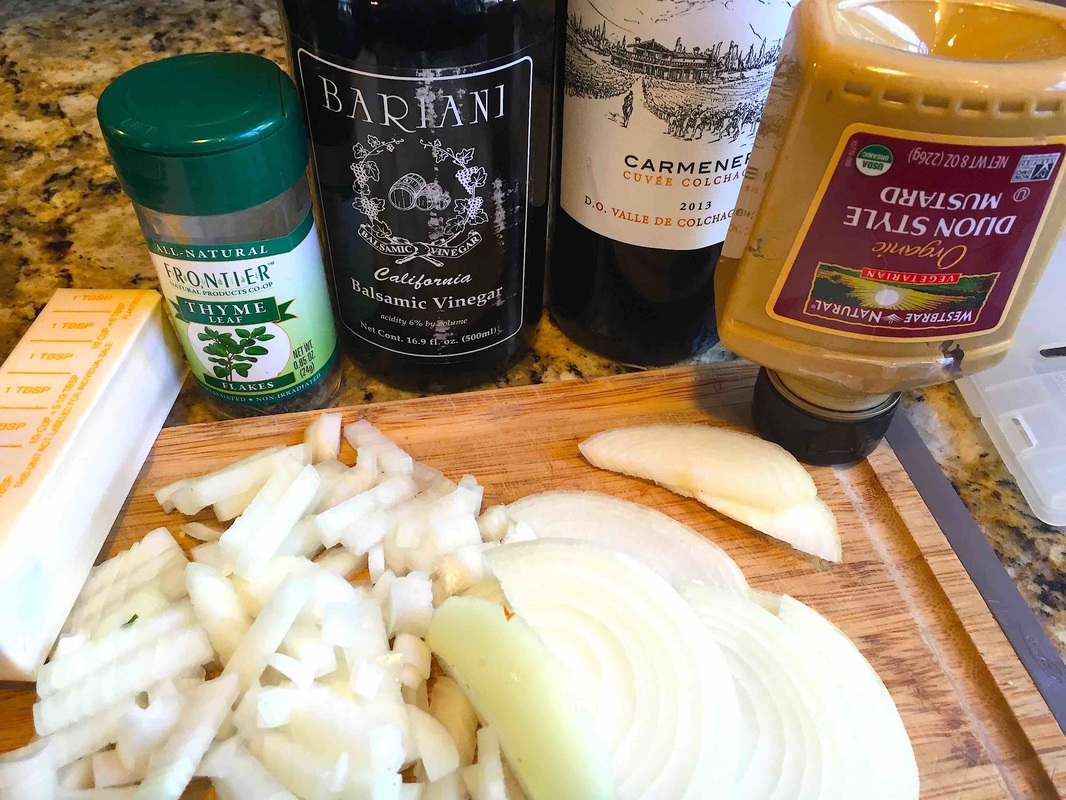 To make the sauce, you're going to need the sauteed onion, butter, thyme, balsamic vinegar, red wine, and dijon mustard. 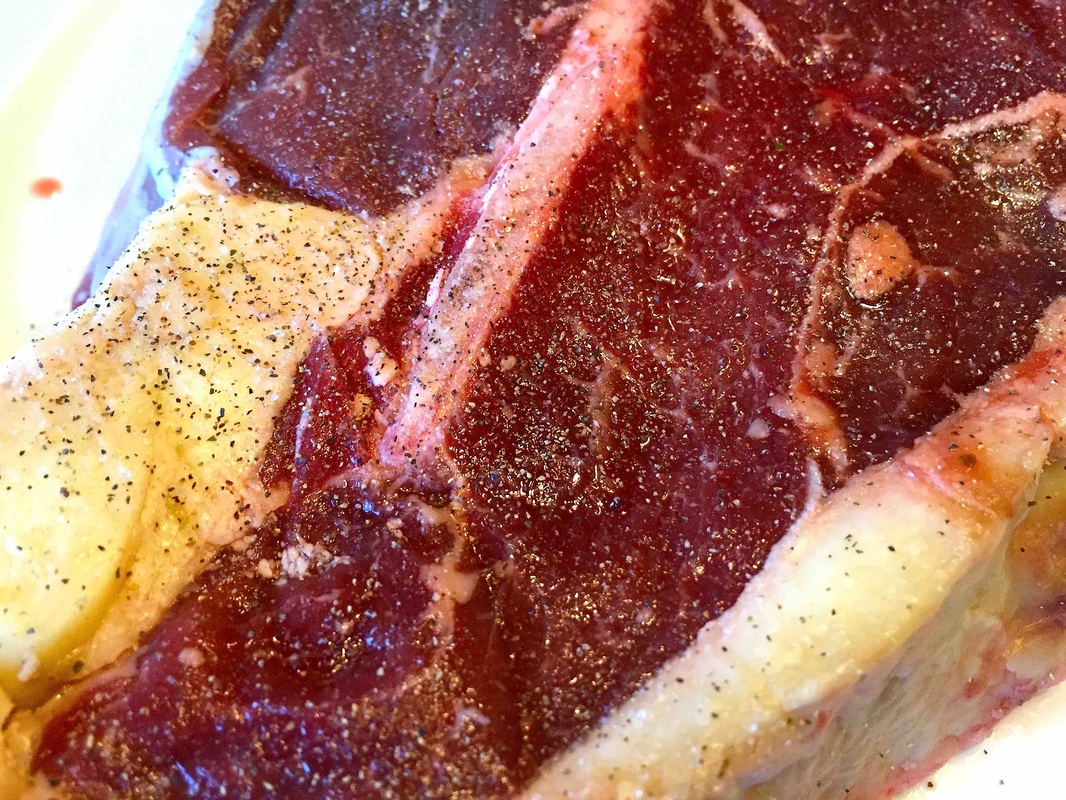 Take out the steak from the fridge. Let it warm up to room temperature. Rub some olive oil on the steak, then add salt and pepper. Turn on the oven to 350 F.
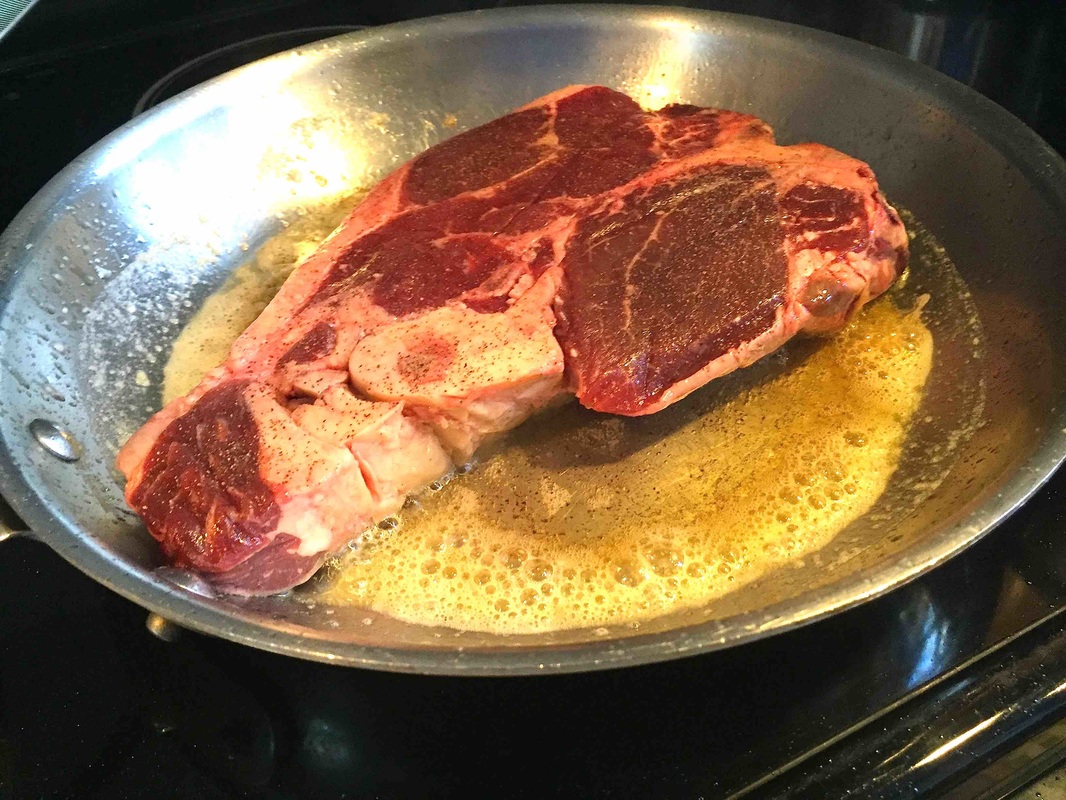
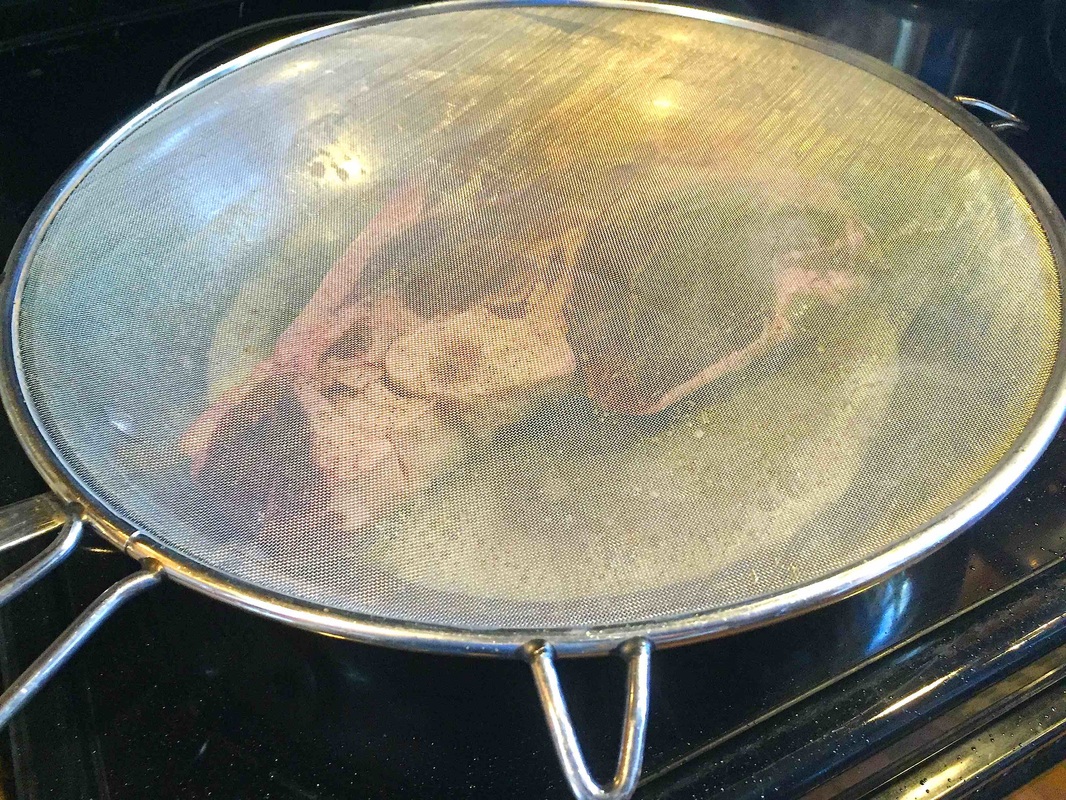
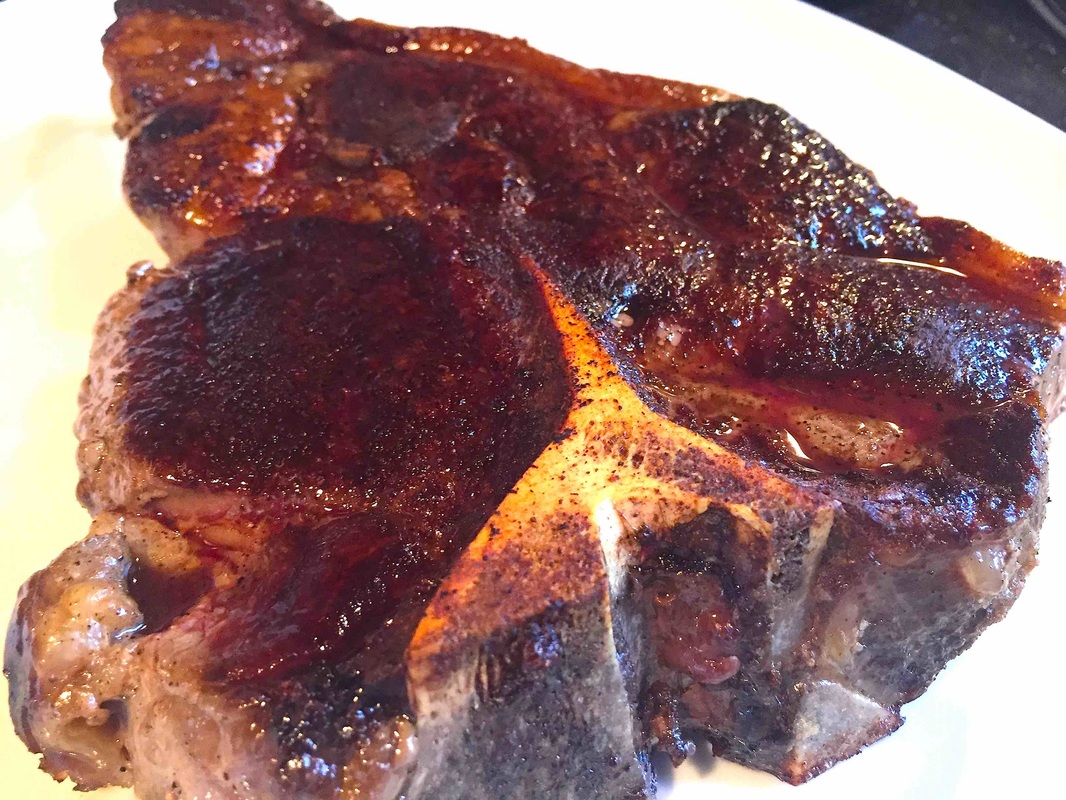
Heat up a pan. Throw the steak on there. Add a few chunks of unsalted butter. That butter will later on be the brown scraping stuff used for the sauce. You'll want to cover the steak, because it'll be popping hot butter in the pan. The goal is to sear the steak sides for one minute. To seal in the juices. 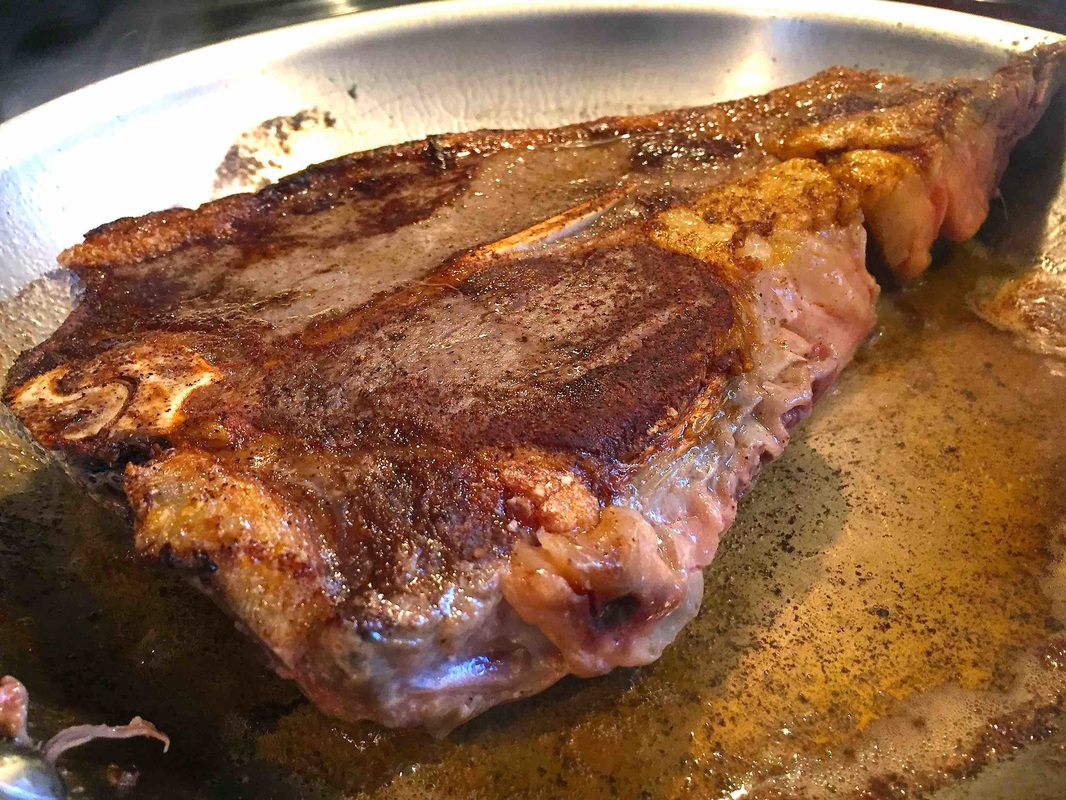 One minute on one side. Flip. One minute on the other side. It should look like this. 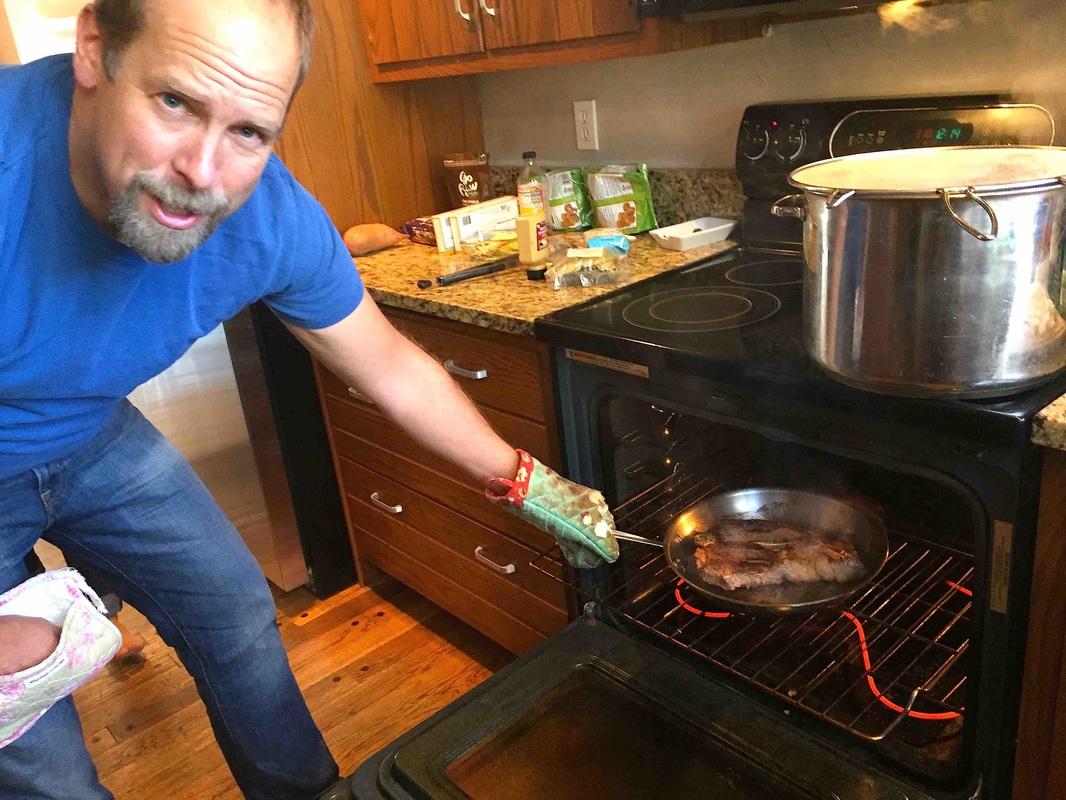 Grab a mitten. Grab the pan. Slide it into the oven. Cook the seared steak in the pan in the oven at 350 for about 4 minutes on either side. Flip after 4 or 5 minutes. 10 minutes total maximum cooking time.
While this is all going on, I'm also rendering lard. Lard is the fat of a pig. Rendering is heating it up to get all of the fat out of it. And then we cook with it. It's our main cooking oil. We use it in our test kitchen for everything. 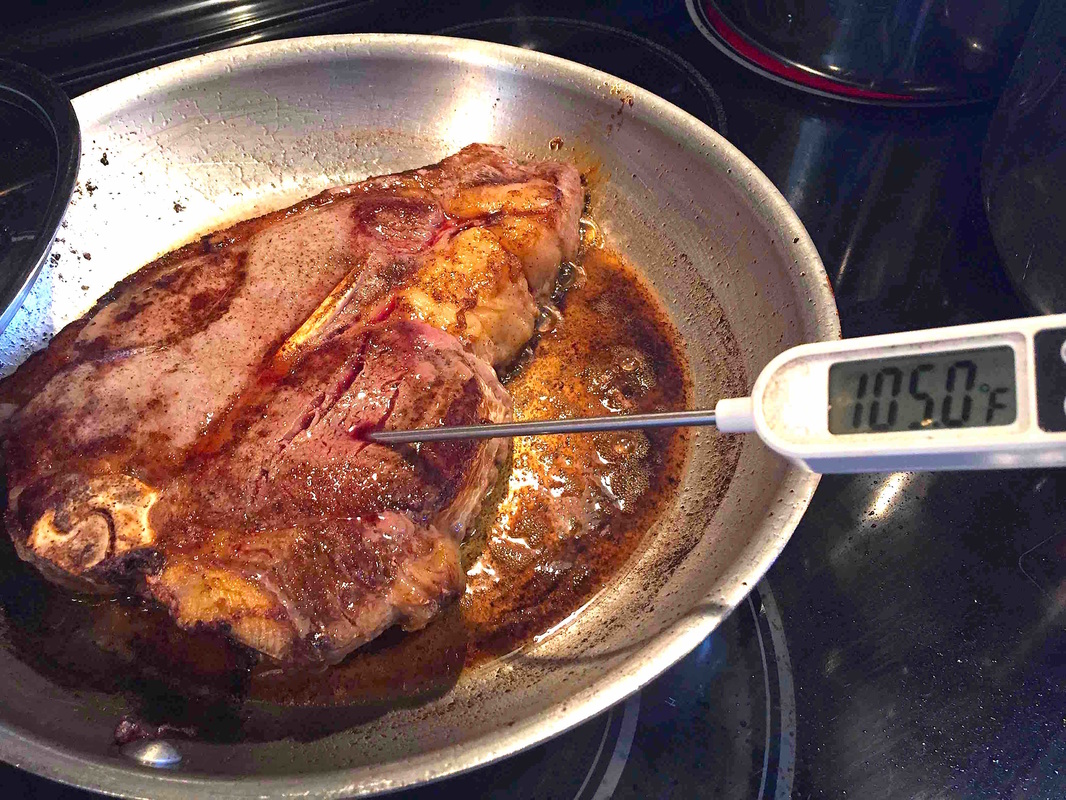 Using a meat thermometer, I'm flawless. Takes out all of the guessing.
After reaching your desired meat temperature, take the steak out of the oven, and out of the pan. Plate it. Let it rest. Now, you're pan is where you make the sauce.
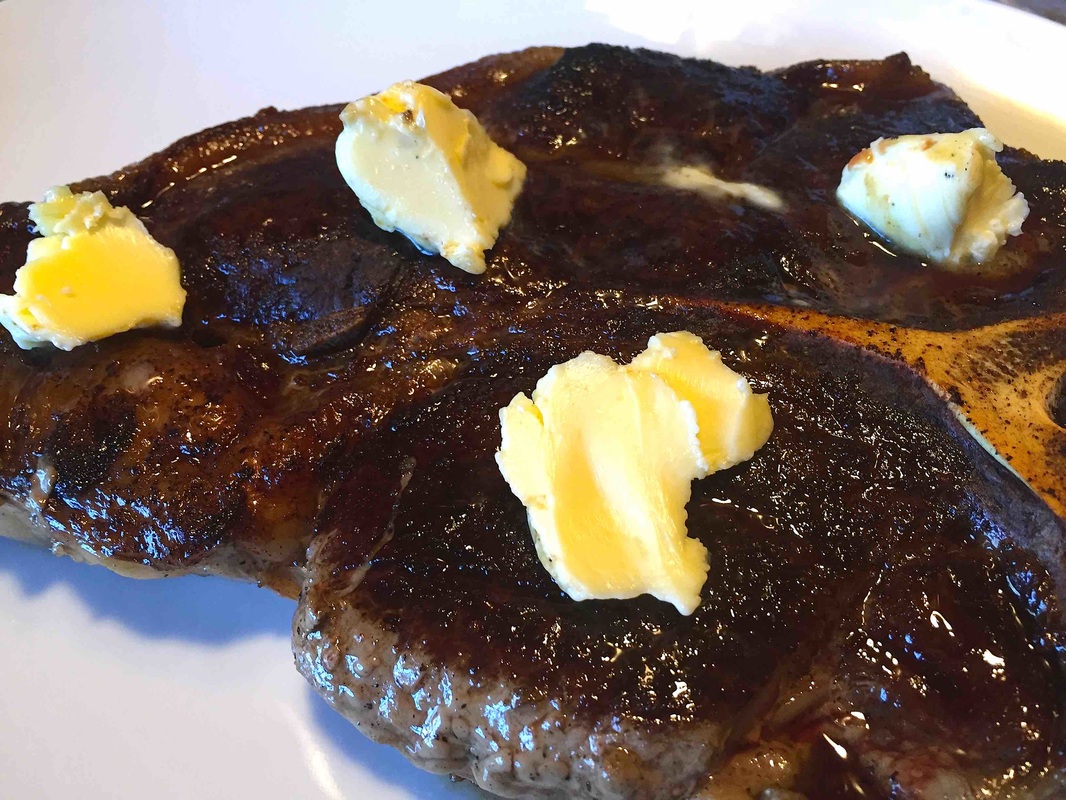
Put slabs of butter on the steak. Cover with foil. Rest it.
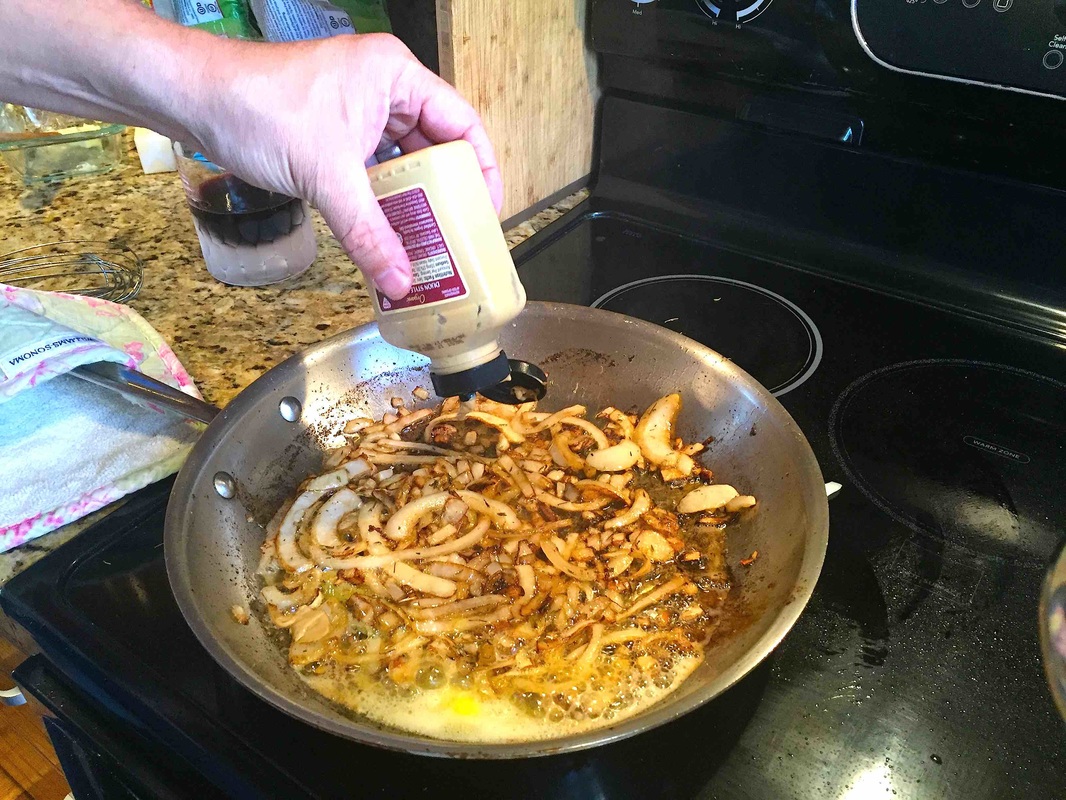
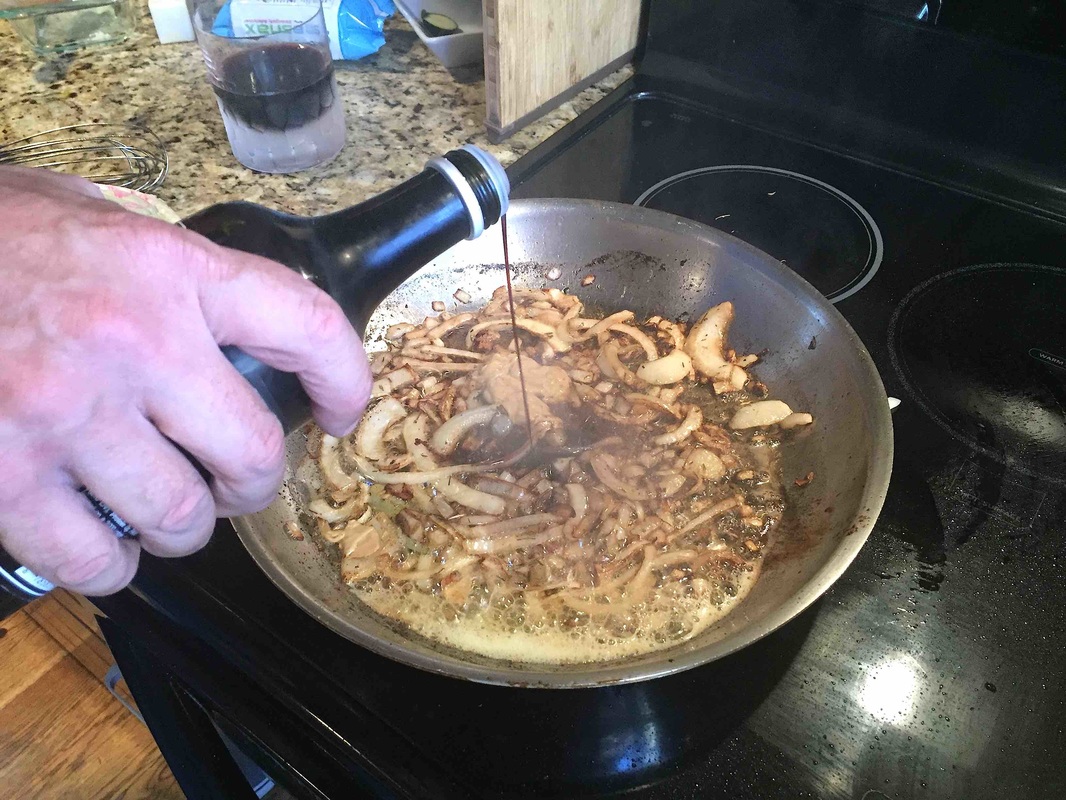
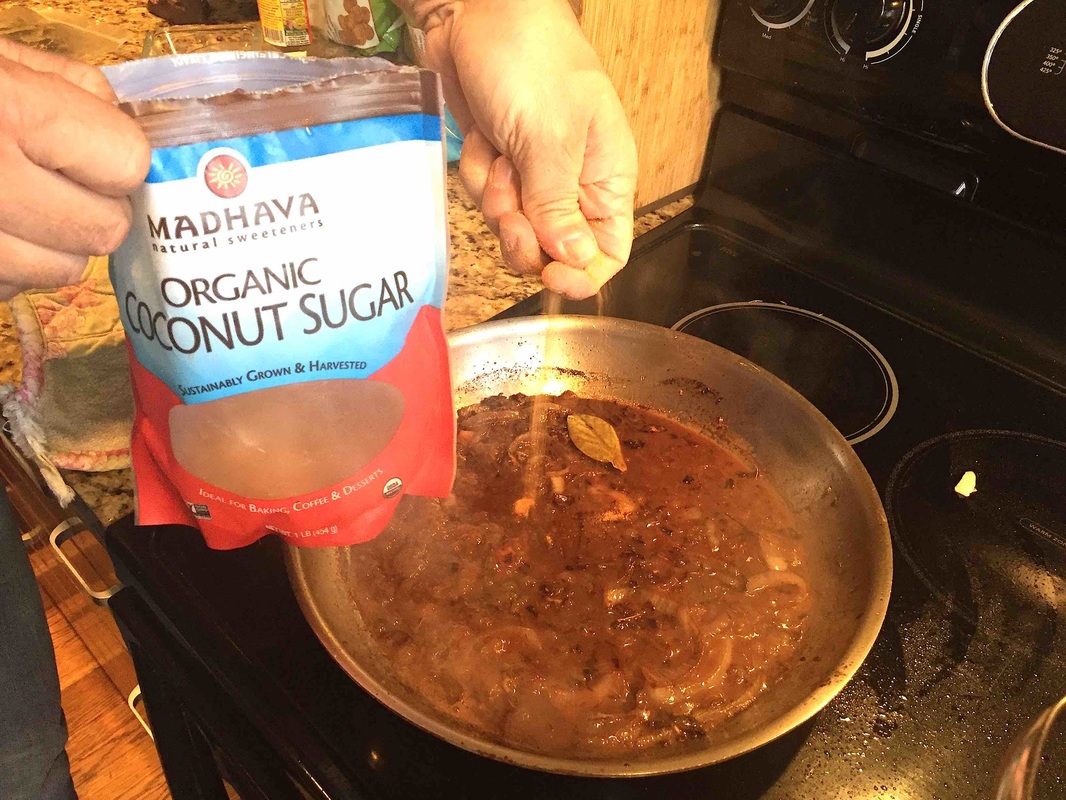
Sautee the onions in the same pan. At a bay leaf. Add some dijon mustard. Add a splash of vinegar.
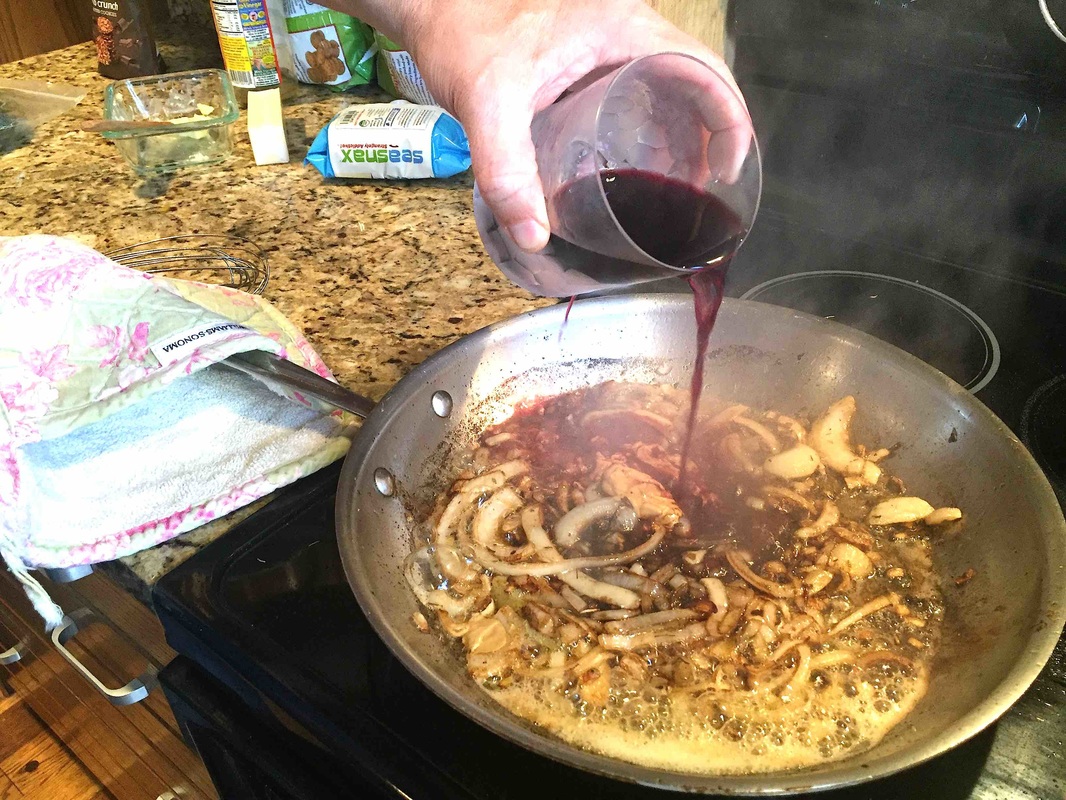
Add the wine. Sweeten the sauce up with some organic coconut sugar. 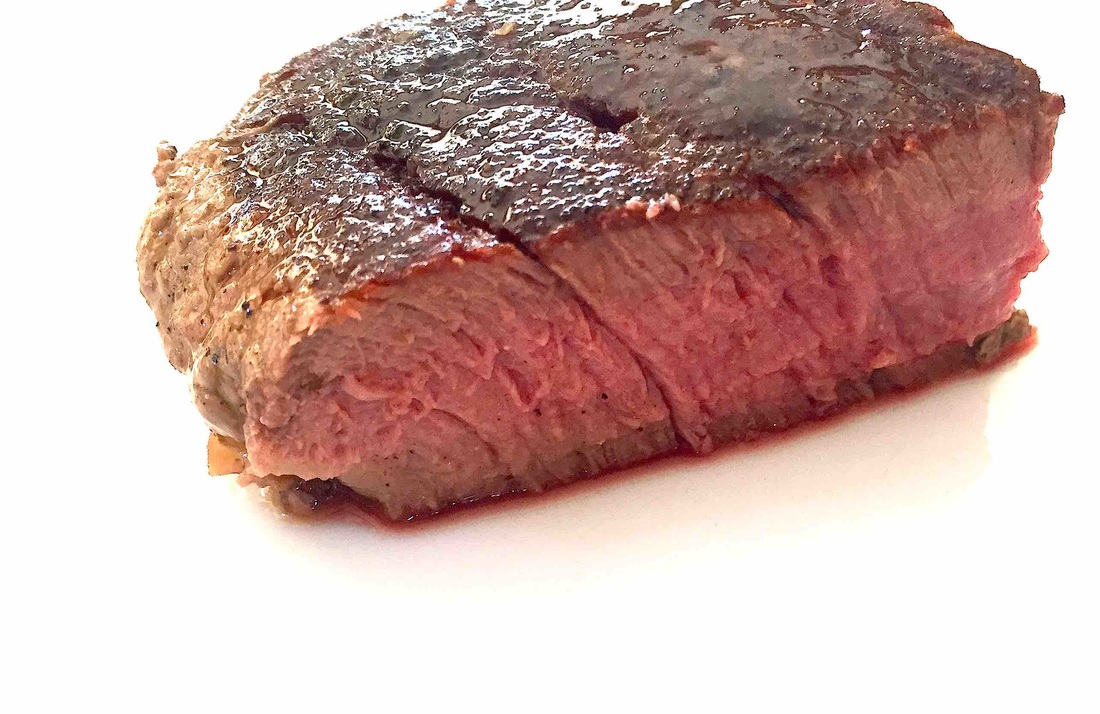 The steak came out perfect. Medium. 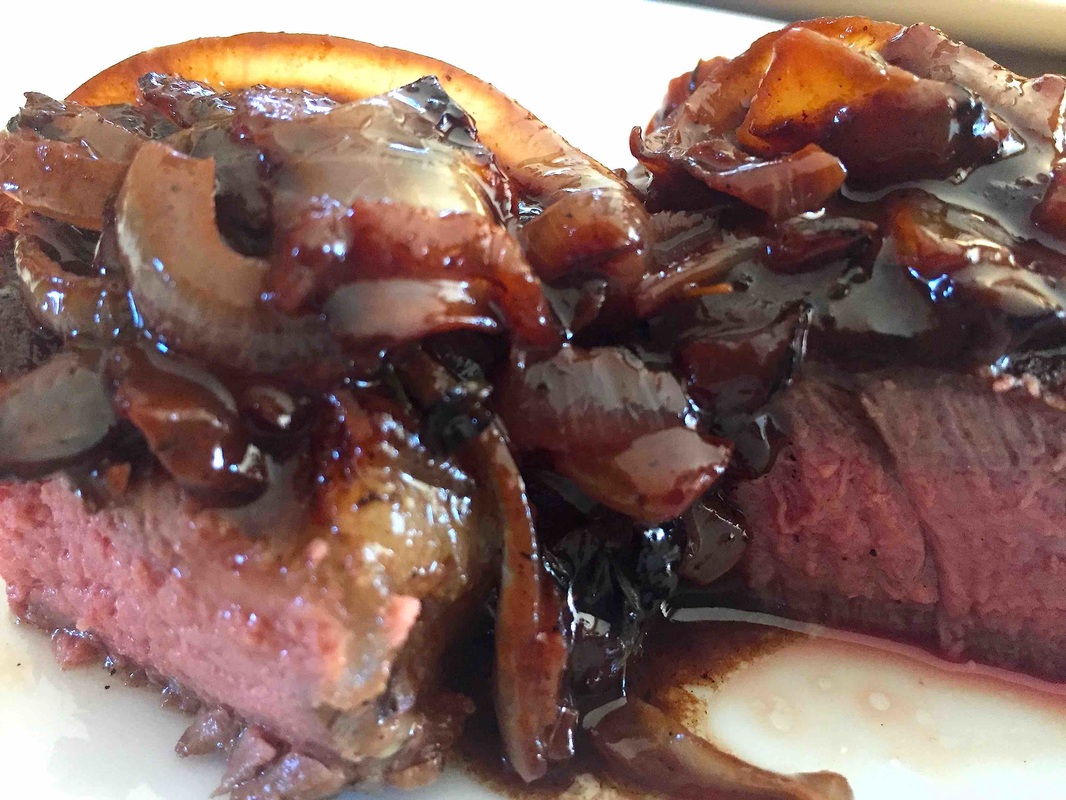 And there you go. Pan seared steak with red wine sauce.
 Here are some tips to grilling juicy, meaty burgers. You can ground your own meat, purchase patties, or make your own burgers with ground meat and other ingredients. That's what we're going to do in this recipe. If you're going to ground your own meat, choose steak tips, grind it coarsely. By adding a bit of salt before shaping adds flavor throughout the entire burger patty. Shape the burgers with a dimple in the middle. This helps prevent bulging. If you have the time, freeze the patties for an hour. That will help hold the meat together as it cooks and provides a little more time to cook the meat on the grill just as you like it. Premade patties are easy, but if you want to learn how to grill a beefy, juicy burger, cook like your grandmother did. Start with a few pounds of ground chuck beef from your butcher. Stir in salt and pepper and a couple egg yokes. Shape the patties. Don't shape the patties too much, because that will make them a denser than necessary. Serve with toppings, like sauteed mushrooms, and some veggies. 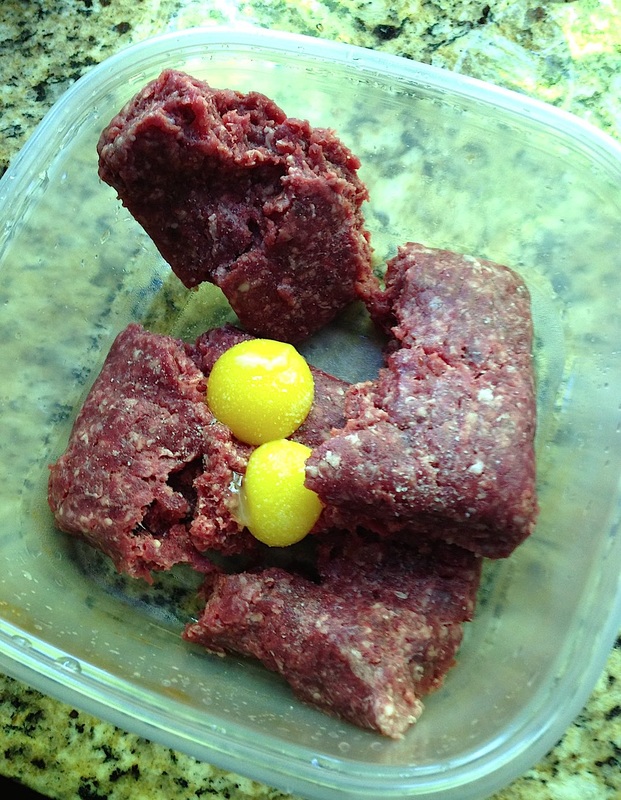 Ingredients
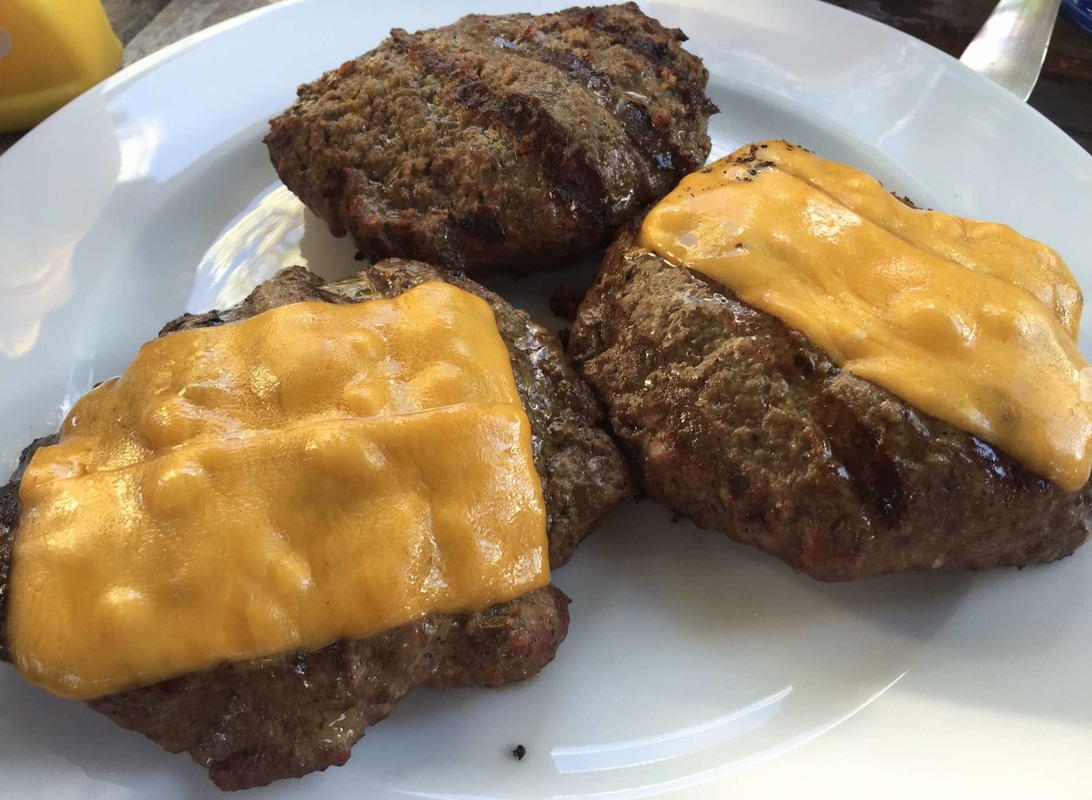
Freeze for 30 After cutting the meat into pieces, you could freeze it. After 30 minutes, the meat should feel firm and pliable. Grind Then, grind the meat and butter all together. You can use a grinder or food processor. Salt and Pepper Add salt and pepper into the ground meat and combine. 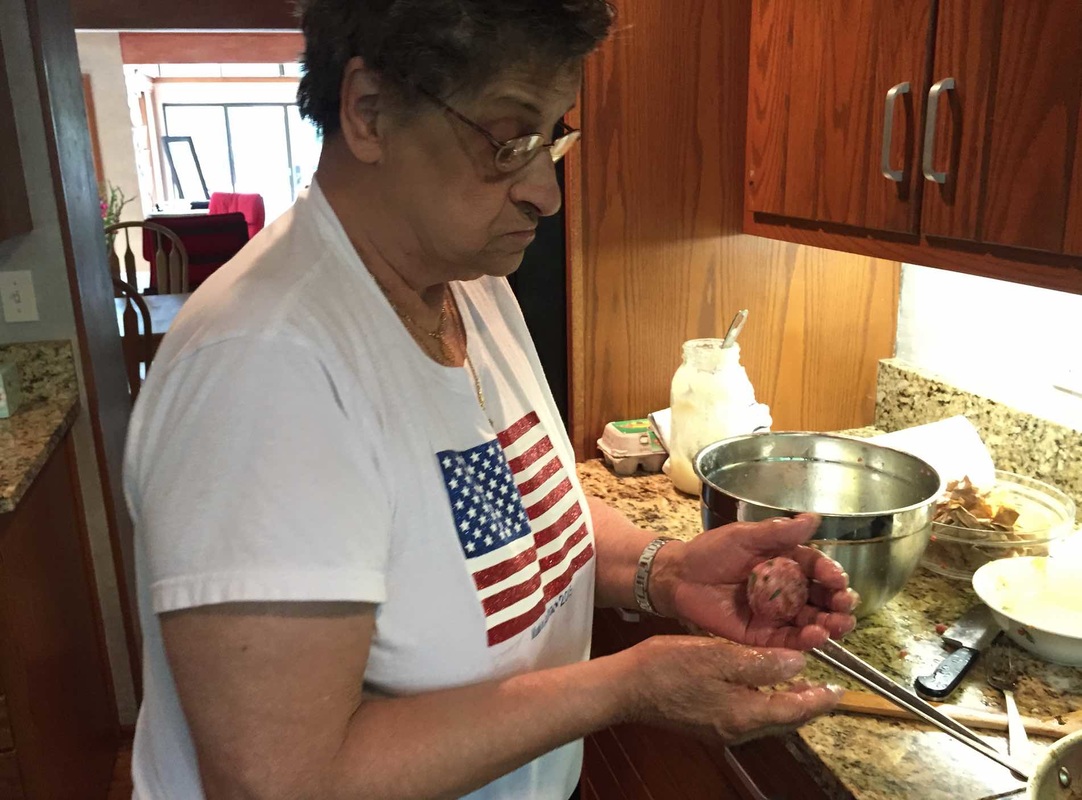 Balls This amount of meat could yield about 5 balls, formed by your hands. Give each ball a light squeeze. That's Alicia's grandmother forming the meat balls in her hands. Patties Then, shape each ball into a patty that's no more than 1-inch thick. Feel free to make the patties into any shape and size. My girls enjoy eating lots of little burgers. Dimple With your thumb, dimple the middle about half-way into the thickness of the patty. If you want to freeze the meat patties, do it now for about 30 minutes. 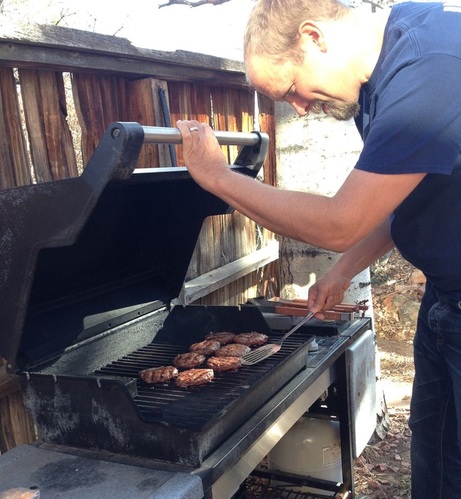 Hot Grill Turn all burners on high. Scrape, brush, and oil the grill. Add more salt and pepper to season both sides of the patties. Throw the meat on the hot grill. Cook for about 4 minutes. This will achieve a good char mark and they shouldn't stick. Don't move them until the time is up. Then, use a spatula to flip. Grill patties. Again, don't move them. The patties should releases from grill in about 4 minutes. Grill the meat until it reaches your desired temperature. If it's not quite done to where I want them, I'll leave the patties on the grill, but adjust the burners. So, I'll turn off the front burners, slide the patties to the front, and leave the back burner on high. This will allow the meat to cook slower, without flame flares and excessive charring. 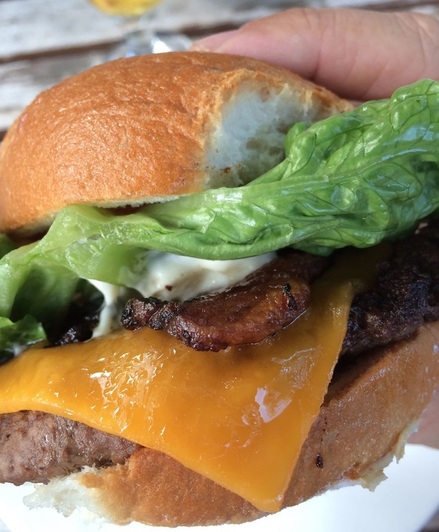 Plate Spatula the patties to a nice big, white plate. Let them rest for a few minutes. While they're resting, you could toast the buns a bit on the grill. Careful not to burn them. I eat burgers on romaine lettuce. Don't laugh. Buns make me fluffy. I love paleo. Serve. Don't forget the veggies, or at least a tomato salad. 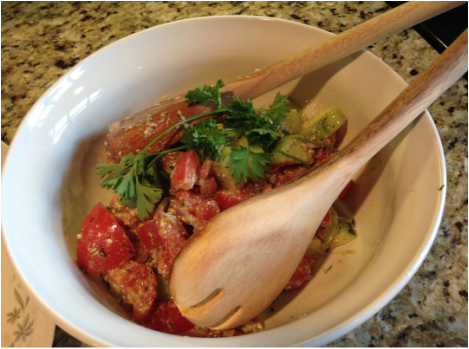 Avoid Store Meat Avoid buying ready-made burger patties from the store. We tested many types of ground meat, hundreds of pounds, and already-made patties, many dozens, from several organic grocery stores and good butchers. This meat will usually cook tough and dense, because it's ground fine and then tightly packed, which causes the protein myosin glue the meat together. Ideally, you want to grind your own meat and gently form it into juicy, tender patties. Avoid Too Much Salt Avoid adding too much salt into the meat mix. That'll make the burger tough. Just a bit of salt will help the meat hold its juiciness. 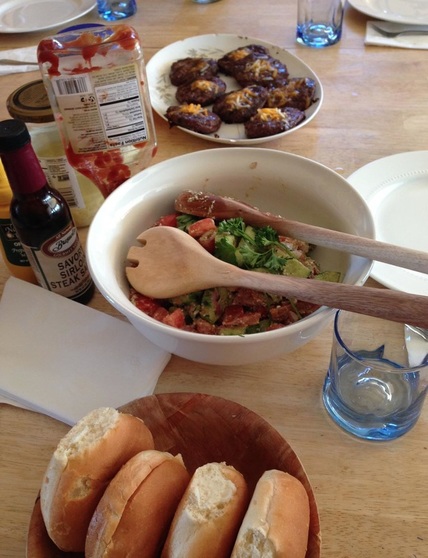 |
 Archives
December 2021
|